Showing posts with label DIY. Show all posts

Rock To Rocking Rock

ADSENSE HERE
Last weekend I gave my garden TLC after almost 10 months. Which is very very long time and unusual for me to stay away from my garden. Well, after spending few hours there in my garden re- potting, manuring, pruning and dead heading, not only my garden looks neat, clean and reinvigorated  now but it was a soothing and therapeutic for me too. 

Pebble Painting

When I was re-potting a plant, I found a rock in soil and the very next moment I wound up all my gardening work, got the rock on my desk and began playing with my imaginations. 

Garden Accessories

Though there are lots of inspiration available on various sources on internet for rock painting but what satisfies me the most is when I paint my own imagination. I thought I will make a bird then I though a flower then peacock was in my mind but then I saw a butterfly in my garden and that's where I drew my inspiration from.  


Garden Accessories

Painted butterfly in vibrant colours and gave background a mottled effect that I learnt from my mother when I was child. Whenever I paint I always think of her :)
Then the top of the rock was looking little blank and my butterfly was lonely too. So I painted everyone's favourite frangipani flower and on the other side of the rock painted some tiny yellow flowers. 

Garden Accessories


Now it was time to bring it back in the garden and see.....
it has added charm to my garden.

Garden Accessories


So what if my dwarf Ixora has stopped blooming, I can add colours this way :)

Garden Accessories

Now can someone please give me some more rocks and pebbles. My hands are still itching to paint more...!!

Garden Accessories

Would love to hear from you. Did you like my painted rock. 
Stay tuned to know what's exciting coming next.


ADSENSE HERE

DIY Owl Planter

ADSENSE HERE
Sometimes most of the time I get innovative ideas in my dream about my art and craft work. 
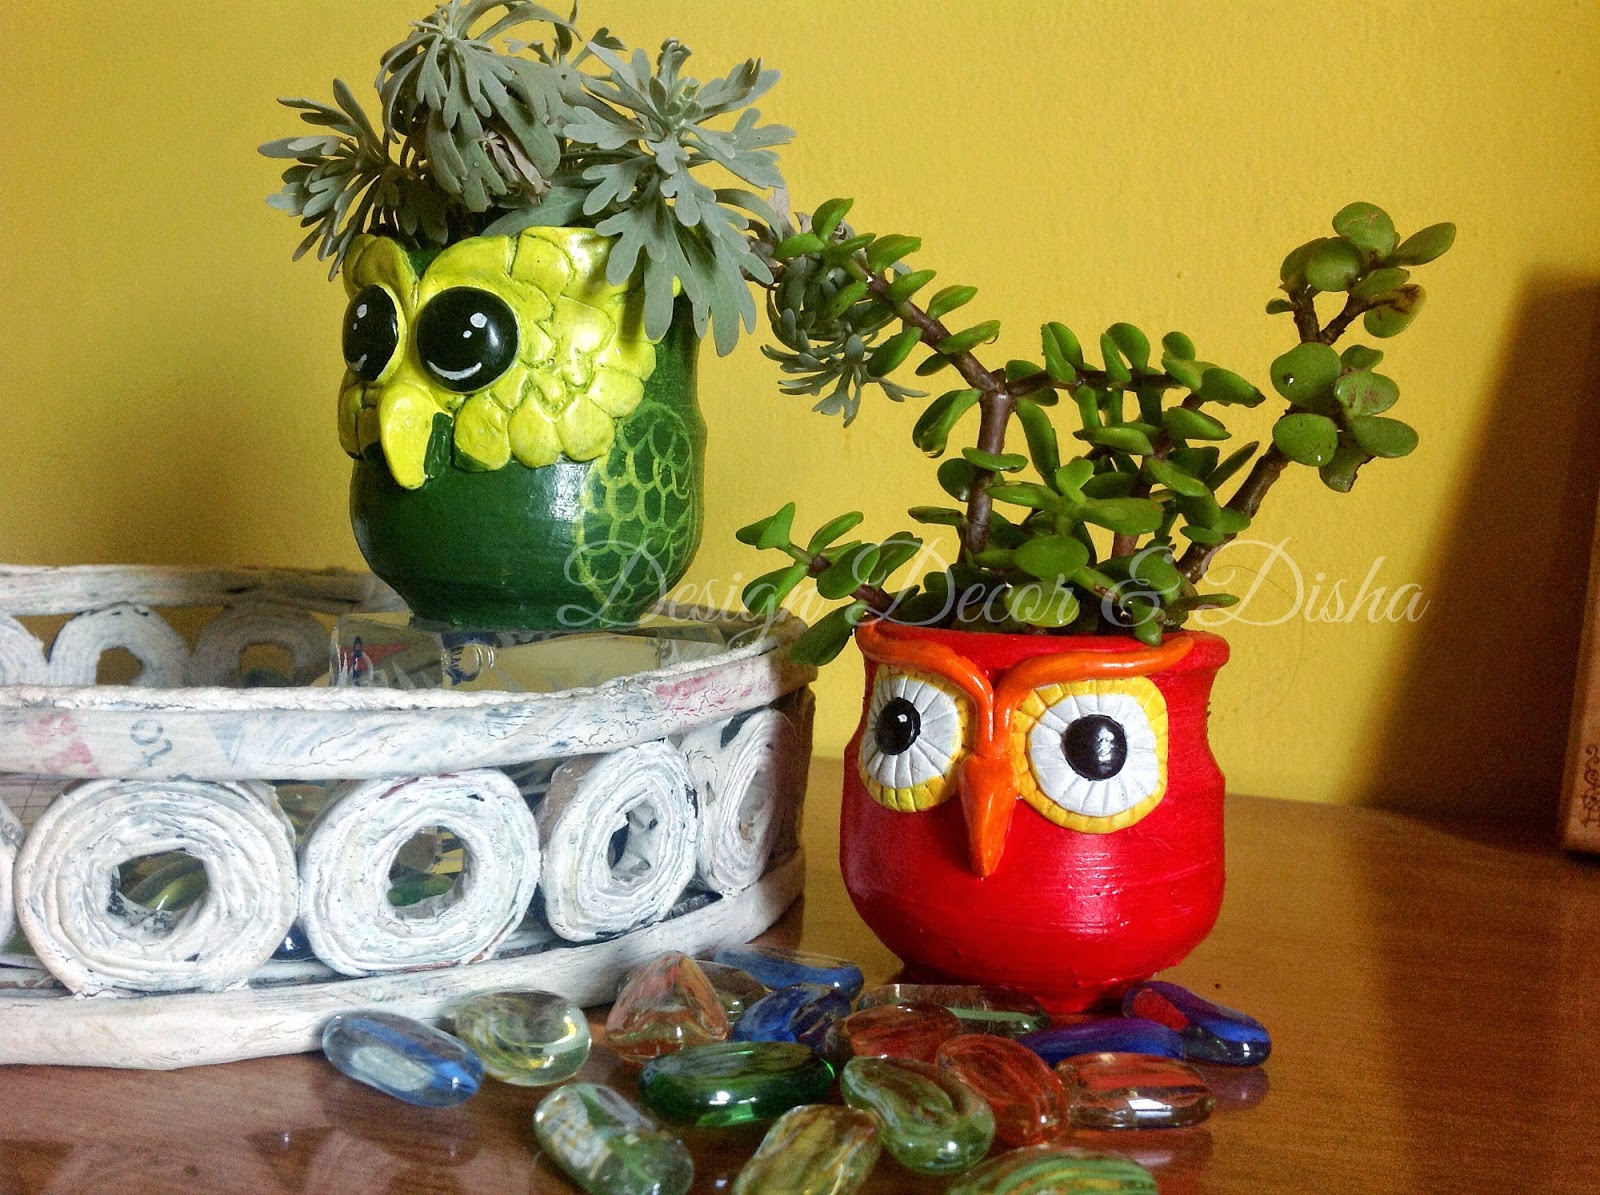
Few days ago I saw tiny clay pots kept on my kitchen window sill and the same night I saw owls made of those tiny clay pots in my dream. Next day without giving it a second thought and without any planning I just started making owl planters and viola!!! the result was awesome. See here they are..

Owl Planter tutorial

 I even named them Peter and Paul. All my readers and Facebook page fans wanted me to share the procedure of making Peter and Paul. So here is the procedure:

  • Supplies:
       Hobby ideas Shilpkar/M-seal
       Carving knife/ craft knife
       Glue
       Talcum powder
       Plastic sheet
       Clay pots (any size)
       Acrylic paint
       Paint brush
       Varnish       
  • Procedure:
1. First wash the clay pots thoroughly and let it dry. Now You can apply a coat of varnish inside the pot to seal it.

2. Now prime the outside of pot with white acrylic paint and let it dry. In below image you can see Hobby Ideas Shilpkar. It contains two packets, one is resin and the other is hardener. Take equal amount of both resin and hardener and mix them well. 

Owl Planter Tutorial


3. Keep the plastic sheet on working area and dust it with talcum powder to avoid Shilpkar clay sticking to sheet. Now take a small amount of clay, put it on sheet and roll it out as shown in below image. For rolling you can use pen or pencil.

Owl Planter Tutorial


4. As I didn't have carving knife I used craft knife to give shape and cut the clay. Though the carving doesn't look neat when you use craft knife. You can use something else like toothpick, empty ball pen or anything else that can solve the purpose better. 

Owl Planter Tutorial


5. Made two carved parts (left and right) and joined them. Then I took small amount of clay, made beak of owl and pasted it on carved clay. Now gently pick up the clay and paste it on the pot.

Owl Planter Tutorial


6.  I made two different kind of owls. It was hard to make features of Peter so I went easy on making Paul and gave it simple look. When it is dried prime it too. 

Owl Planter Tutorial

7. Now the last thing is to paint it in your desired colour and let it dry. You can give a protective coat of varnish if you wish.  It's done!!! See how I am using my Peter and Paul..........

Owl Planter Tutorial

Owl Planter Tutorial

You can see the before and after of my tiny clay pots in image below. 

Owl Planter Tutorial

Some of my artwork that is exclusively mine and not inspired from any other source, you can check out on 'Exclusively By Design Decor & Disha'. 

Stay tuned!!In my next blog I will be posting about my work-space makeover. 


ADSENSE HERE

DIY Ideas For This Weekend

ADSENSE HERE
You may want to try your hand on some easy DIY this weekend. Here is a list of newspaper crafts that I have shared earlier on my blog. Click on the respective link to know the complete procedure.


I have made different kinds of trays and baskets using newspaper and let me tell you no one believes that they are made of newspaper. If you want to have a look of them then click here to see my newspaper baskets and click here to see my newspaper tray.


Newspaper Craft


Newspaper wind chime is what I never saw or heard about. So I gave it a try and was a big hit. Do you want to learn how to make Newspaper wind chime, then click here.

Newspaper Craft


First I tried making simple newspaper coasters and then tried making them in different patterns and designs too. Coasters are liked by one and all. All my customers and friends are happy using and flaunting them. Click here to check out the video tutorial on how to make newspaper coasters. 

Newspaper craft

Newspaper Crafts


I am so sure that you will enjoy making these paper crafts. 
Wish you a creative and happy weekend!!

All images are mine and subject to copyright. Please don't use any image without my permission. Thanks!!


ADSENSE HERE

DIY Newspaper Coasters

ADSENSE HERE
   I have been getting requests for posting video tutorial on how to make newspaper coasters. So here I am sharing the tutorial, hope you all will like it.


Enjoy the tutorial and don't forget to subscribe to my YouTube channel. Thank you!!


Here is a link to my Instagram gallery in case you want to join me there too :)

ADSENSE HERE

Diary Of a Design Blogger

ADSENSE HERE
One who knows me more than anyone in this world, gifted me this thoughtful gift- a diary. He knows that I plan everything well in advance and for that I need a diary. Not only I write my favourite quotes and all those things that make me happy everyday but I write about my  blogging journey too. 
Though my husband's gift was very thoughtful but it's cover was so dull, that the moment I held it I wanted to change it and I did so. Now it's totally my kind of and it sure is a diary of a design blogger.


Diary of a design blogger

I told you on my Facebook page today morning that I will be coming up with an easy peasy DIY, I was talking about this diary makeover. Hers is how I did it:
First I covered the diary in my favourite green handmade paper.

Diary of a design blogger

Now I wanted something interesting on the diary cover. I have been hoarding cuttings of this elephant picture from incense stick's pack because I don't know why but I find it very intriguing. So I used decoupage technique and pasted the elephant cut out on the diary. 


Diary Of A Design Blogger

And added some cut outs of flowers and tree trunk from a magazine that I found lovely.

Diary Of A Design Blogger

For bookmark I punched a hole in an elephant cut out and tied it with satin ribbon. Here's bookmark is ready and going pretty well with the diary.

Diary Of A Design Blogger

Here is a close up of my graceful elephant.

Diary Of A Design Blogger

Did you like this Diary Makeover, I totally liked the outcome. It's my kind of :)


ADSENSE HERE

DIY Lippan Work: Video Tutorial

ADSENSE HERE
Thank you so much dear all for appreciating my Lippan Work Wooden panels. I am overwhelmed by the response I got. So I created a video tutorial exclusively for my wonderful readers who want to try their hand on this art.

Indian Art


In my last post about Asus Zenfone 6 you saw how I am super impressed with ZenFone 6 and exploring its wonderful features every passing day. So this was the perfect time to test its video recording feature too. I just picked up the ZenFone 6, gathered all the supplies needed for making Lippan work wooden panels, started shooting video and without any editing published it on YouTube. It was extremely easy and quick to make a video tutorial with ZenFone 6 and the most amazing thing was publishing it on my YouTube channel right after I finished shooting it. 

I watched the video I shot, over and over again in great disbelief that how a mobile with some amazing features can save so much time. I had spent around 4-6 hrs in making video tutorials earlier and it was hassle to shoot and then edit the video.
While making video with ZenFone 6, I noticed that I can pause the video number of times whenever I want and can resume it later, it is wonderful feature specially when I am shooting DIY tutorials. Video and sound clarity is excellent.
Below is the video tutorial of Lippan work. You can check out the video and its sound quality. I found it wonderful.


Few more things that I am trying to do with ZenFone 6 is that I am creating a movie with its 'Movie Maker', using series of pictures or videos and then I can edit it.

ZenFone 6 Review

I captured lots of pictures too, will share them in my next post with all the other good features that I am exploring in ZenFone 6

Want to see more images of my Lippan Work then click here.


ADSENSE HERE

Diwali DIY Made Easy With Venue: Wall Hanging DIY

ADSENSE HERE
This month I will be focusing on Diwali craft and decor ideas only. In previous post you learnt how to make a Diwali Lamp. In today's tutorial you will learn how to make beautiful wall hanging using mundane objects. These hangings add charm to your walls for sure. The best part is that it's very easy to make these hangings. It took me only an hour to complete the project.

Diwali Wall Hanging

Dell's venue tab has made my work easy. I clicked all the images of this DIY with Venue tab and then I made a video using its wonderful application called 'Movie studio' in no time.

Diwali Craft Ideas Using Dell Venue

Here my movie is in progress..........

Diwali Craft Ideas Using Dell Venue

Below is the complete video tutorial on how to make wall hanging. Enjoy!!


Stay tuned for some more Diwali Decor ideas in my next post!! 


ADSENSE HERE

DIY: Decoupage Slippers

ADSENSE HERE
What do you do when something is just not ready to wear out.
I have something like that with me since past eight years and it's still in good condition. The only thing is that I am super bored of its plain and dull look. It's my slippers.....yes you heard it right. Please don't laugh or make fun of me. They are really boring, have a look.......
and they are too common.
Kitschy Slippers


So what do you suggest I should do with this slippers...........
Well kitsch and decoupage was on my mind since long so why not fulfill both the desires and at the same time give new look to the extremely boring slippers. 
So here I go with some easily available supplies:

Kitschy Slippers


  • Colorful paper cuttings from Magazine
  • Scissors
  • White water based glue
  • Acrylic Medium/ Modpodge
  • Brush
  • Varnish

1. I washed it and then let it dry completely. applied acrylic medium on the surface and put paper cutting.

Kitschy Slippers

2. Then I applied acrylic medium on paper too that I pasted. Kept on doing step 1 and 2 until the surface was all covered with paper. Let it dry.

Kitschy Slippers


3. Then I mixed 1 part glue in 1 part water and applied it properly on the surface and pasted a cutting of this cute doll that I found in magazine. Let it dry.

Kitschy Slippers

Kitschy Slippers

4. After it was completely dried I gave two coats of varnish and it is almost waterproof and that's how it looks now!!

Kitschy Slippers

I am happy with the outcome. Though I don't know how long it will last but I am happy that it is not an eyesore anymore. I love wearing it :)

Kitschy Slippers

Some more clicks............

Kitschy Sippers

And finally I am done with Decoupage and Kitsch as well. How do you like this DIY. 
Do let me know which version of the slippers you liked...the earlier one or decoupage one!!

Kitschy Sippers

Wishing you happy and creative weekend. Have a great fun!!


ADSENSE HERE